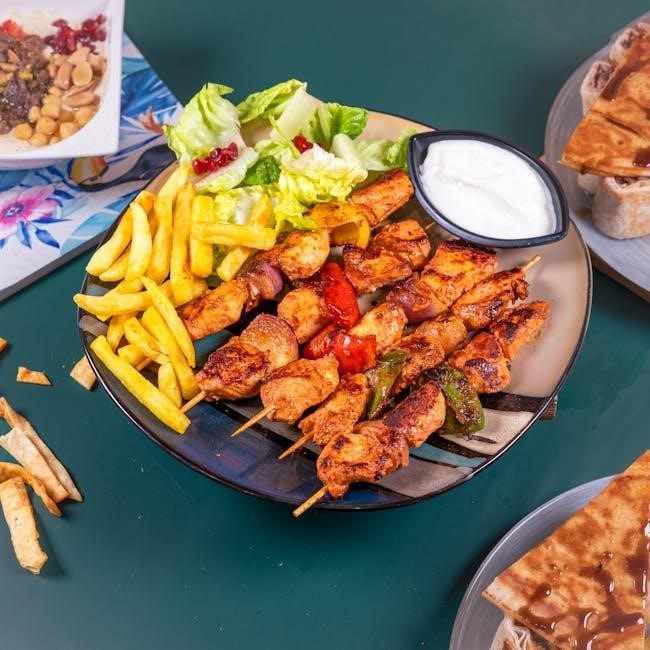
Ore-Ida French Fries Cooking Instructions
Craving crispy, golden Ore-Ida fries? This guide provides various
cooking methods, ensuring perfectly cooked fries every time.
Whether you prefer oven-baked, air-fried, or grilled fries,
we’ll walk you through the process for delicious results.
Ore-Ida French Fries are a beloved classic, known for their consistently delicious taste and ease of preparation. Since 1952, Ore-Ida has been a staple in American households, offering a variety of french fry styles to suit every preference. From the classic Golden Crinkles to the zesty seasoned varieties, Ore-Ida uses freshly peeled, American-grown potatoes to create fries that are crispy on the outside and fluffy on the inside.
The brand prides itself on taste and quality, ensuring the best and freshest tasting potatoes. Ore-Ida fries are perfect as a side dish to burgers, sandwiches, or as a snack on their own. They are also versatile enough to be incorporated into creative dishes like loaded fries with cheese and bacon.
Whether you’re looking for a quick and easy meal or a crowd-pleasing appetizer, Ore-Ida French Fries are a convenient and satisfying choice. With various cooking methods available, including oven baking, air frying, and grilling, achieving that perfect crispy texture is simple and straightforward.
Oven Baking Instructions
Oven baking is a classic method for preparing Ore-Ida French Fries, yielding crispy and evenly cooked results. To begin, preheat your oven to the recommended temperature, typically 425°F (218°C) or 450°F (232°C), as indicated on the packaging. This ensures the fries cook properly and achieve optimal crispness.
While the oven preheats, prepare a baking sheet by lining it with parchment paper or using a non-stick baking pan. Arrange the frozen fries in a single layer on the baking sheet, avoiding overcrowding. Overlapping fries can lead to uneven cooking and a less crispy texture.
Once the oven is preheated and the fries are arranged, place the baking sheet in the oven. Bake for the recommended time, usually 20-25 minutes, flipping the fries halfway through to ensure even browning. Monitor the fries closely during the last few minutes of baking to achieve your desired level of crispiness. Remove from the oven and let cool slightly before serving. Season to taste.
Preheating the Oven
The first, and arguably most crucial, step in achieving perfectly oven-baked Ore-Ida French Fries is preheating your oven to the correct temperature. This ensures that the fries cook evenly and reach their maximum crispiness potential. Refer to the Ore-Ida package for the recommended temperature, which typically ranges from 425°F to 450°F (218°C to 232°C).
Allow your oven to fully preheat before placing the fries inside. This may take approximately 10-15 minutes, depending on your oven model. Using an oven thermometer can help ensure accurate temperature readings. Avoid the temptation to reduce the preheating time, as this can compromise the final texture of the fries.
A properly preheated oven provides the consistent, high heat necessary to cook the fries quickly and evenly, resulting in a delightfully crispy exterior and a fluffy interior. Skipping or shortening the preheating process can lead to soggy or unevenly cooked fries, so it’s essential to be patient and allow your oven to reach the optimal temperature.
Arranging Fries on Baking Sheet
Once your oven is fully preheated, the next critical step is properly arranging your Ore-Ida French Fries on a baking sheet. This seemingly simple task significantly impacts the final crispiness and evenness of the fries. To ensure optimal results, avoid overcrowding the baking sheet. Overcrowding creates steam, preventing the fries from achieving their desired golden-brown crispiness.
Instead, arrange the frozen fries in a single, even layer. This allows heat to circulate freely around each fry, promoting uniform cooking. If necessary, use two baking sheets to prevent overcrowding. For enhanced crispiness and easy cleanup, consider lining the baking sheet with parchment paper.
Alternatively, a non-stick baking sheet or a shallow baking pan sprayed with cooking spray can also be used. Avoid overlapping the fries, as this will result in some fries being undercooked and others potentially burning. Take the time to carefully spread the fries out, ensuring each one has ample space to cook properly. This simple step will contribute significantly to a batch of perfectly crispy, oven-baked Ore-Ida French Fries.

Baking Time and Temperature
Achieving perfectly baked Ore-Ida French Fries hinges on the correct baking time and temperature. Typically, a preheated oven set to 425-450°F (218-232°C) is ideal. The exact temperature might vary slightly depending on your oven, so consult your oven’s manual for accuracy. Once the oven is preheated and the fries are arranged in a single layer on a baking sheet, it’s time to bake.
The general baking time ranges from 20 to 25 minutes, but this can fluctuate based on the specific type of Ore-Ida fries and your desired level of crispiness. Halfway through the baking process, around the 10-12 minute mark, use a spatula to flip the fries. This ensures even browning and crisping on all sides.
Keep a close eye on the fries during the final minutes of baking, as they can quickly go from golden brown to burnt. For extra crispy fries, you can add a few more minutes to the baking time, but watch them carefully. Remove the fries from the oven when they reach your preferred level of crispness and color.
Air Fryer Instructions
Air frying Ore-Ida French Fries offers a quick and healthy alternative to traditional deep-frying, delivering crispy and delicious results with minimal oil. The process begins with proper preparation and understanding of your air fryer’s settings.
Before adding the fries, preheating the air fryer is often recommended to ensure even cooking. Consult your air fryer’s manual for the recommended preheating time and temperature, which typically ranges from 3 to 5 minutes at 400°F (200°C).
Once preheated, arrange the frozen Ore-Ida fries in a single layer in the air fryer basket. Avoid overcrowding the basket, as this can lead to uneven cooking and less-than-crispy fries. If necessary, cook the fries in batches to ensure proper airflow.
Cooking times can vary depending on the type of Ore-Ida fries and your air fryer model. A general guideline is to air fry at 400°F (200°C) for 10 to 15 minutes, shaking the basket halfway through to promote even cooking. Keep a close watch on the fries during the final minutes to achieve your desired level of crispiness.
For added flavor, consider lightly spraying the fries with cooking oil or tossing them with your favorite seasonings before air frying.
Preheating the Air Fryer
Preheating your air fryer is a crucial step in achieving perfectly crispy Ore-Ida French Fries. This process ensures that the fries cook evenly and develop that desirable golden-brown exterior. Think of it like setting the stage for a culinary masterpiece; a well-prepared environment yields the best results.
Before placing your fries in the air fryer, consult the manufacturer’s instructions for the recommended preheating time and temperature. Typically, preheating at 400°F (200°C) for approximately 3-5 minutes is sufficient for most air fryer models. This allows the air fryer to reach the optimal temperature for cooking, promoting even heat distribution.
Some air fryers have a dedicated preheating function, while others require manual setting. If your air fryer lacks a preheat setting, simply set the temperature to 400°F (200°C) and let it run for the recommended time.
Skipping the preheating step can result in unevenly cooked fries, with some parts being crispy while others remain soggy. Preheating helps to create a consistent cooking environment, ensuring that your Ore-Ida fries are cooked to perfection every time. By taking this simple step, you’re setting yourself up for a delightful and satisfying snack or side dish.

Air Frying Time and Temperature
Achieving perfectly air-fried Ore-Ida French Fries hinges on selecting the right time and temperature. Generally, a temperature of 400°F (200°C) is recommended for most Ore-Ida varieties. This high heat allows the fries to crisp up nicely without drying out excessively.
The cooking time will vary depending on the specific type of Ore-Ida fries you’re using and your air fryer model. As a starting point, aim for approximately 8-12 minutes. However, it’s essential to monitor the fries closely during the cooking process.
Halfway through the cooking time, typically around 4-6 minutes, pause the air fryer and gently shake the basket or flip the fries with tongs. This ensures even cooking and prevents sticking.
Continue cooking until the fries are golden brown and crispy to your liking. If they’re not quite crispy enough after the initial time, add another minute or two, checking frequently to avoid burning.
Remember, air fryer models can vary, so it’s always best to refer to your air fryer’s manual for specific recommendations. With a little practice, you’ll master the art of air-frying Ore-Ida fries to crispy, golden perfection.
Grilling Instructions
Grilling Ore-Ida French Fries offers a unique smoky flavor, perfect for outdoor gatherings. While not as common as oven-baking or air-frying, grilling can deliver delicious results with the right technique. The key is to prevent the fries from falling through the grill grates and to ensure even cooking.
One effective method involves using a disposable foil pan. This creates a contained cooking environment and prevents the fries from direct contact with the flames. Before placing the fries in the pan, lightly spray it with cooking spray to prevent sticking.
Spread the frozen Ore-Ida fries evenly in the foil pan, avoiding overcrowding. Place the pan on the grill grate over medium-high heat. It’s crucial to monitor the fries closely to prevent burning, as grill temperatures can fluctuate.
Grill for approximately 15-20 minutes, or until the fries are heated through and slightly crispy. Stir the fries occasionally with tongs to promote even cooking. Be mindful of hot spots on the grill and adjust the pan’s position as needed.
For added flavor, consider tossing the grilled fries with your favorite seasonings after cooking. Serve immediately and enjoy the smoky twist on classic Ore-Ida French Fries.
Preparing the Grill
Before embarking on grilling Ore-Ida French Fries, proper grill preparation is paramount for achieving optimal results. Start by ensuring the grill grates are clean and free of any residue from previous cooking sessions. Use a grill brush to thoroughly scrub the grates, removing any burnt food particles or debris.
Next, determine the type of grill you’ll be using – gas or charcoal. For gas grills, preheat to medium-high heat, aiming for a temperature of around 375-450°F (190-232°C). Allow the grill to preheat for at least 10-15 minutes to ensure even heat distribution across the grates.
If using a charcoal grill, arrange the charcoal for indirect heat. This means positioning the coals on one side of the grill, leaving the other side empty. This setup allows for cooking the fries without direct exposure to the intense heat, preventing burning and promoting even cooking. Once the coals are glowing red and covered with a layer of ash, you’re ready to proceed.
Regardless of the grill type, it’s essential to have a reliable thermometer to monitor the temperature accurately. Consistent temperature control is crucial for grilling fries to perfection. With a well-prepared grill, you’re one step closer to enjoying delicious, smoky Ore-Ida French Fries.
Grilling Fries in a Foil Pan

To grill Ore-Ida French fries effectively, using a foil pan is highly recommended. Begin by selecting a disposable foil pan of appropriate size, ensuring it can accommodate the quantity of fries you intend to cook without overcrowding. Lightly coat the inside of the foil pan with cooking spray to prevent the fries from sticking during the grilling process.
Carefully pour the frozen Ore-Ida French fries into the prepared foil pan, spreading them out evenly in a single layer. Avoid piling the fries too high, as this can hinder even cooking and crisping.
Once the grill is preheated to medium-high heat, carefully place the foil pan containing the fries onto the grill grate, preferably over indirect heat if using a charcoal grill. This helps prevent burning and ensures that the fries cook evenly on all sides.
Grill the fries for approximately 15-20 minutes, or until they are heated through and have reached your desired level of crispiness. Use a pair of tongs to toss the fries occasionally during grilling, ensuring that they cook uniformly and develop a golden-brown color.
Once the fries are cooked to perfection, carefully remove the foil pan from the grill using heat-resistant gloves or tongs. Allow the fries to cool slightly before serving.

